Documentation Index
Fetch the complete documentation index at: https://planetscale.com/docs/llms.txt
Use this file to discover all available pages before exploring further.
Before beginning your migration, we recommend running the PlanetScale Discovery Tool on your database to assess compatibility and ease of migration.
pg_dump and restore. The pg_dump/restore approach is simpler, but is only for applications where downtime is acceptable.
These instructions work for all versions of Postgres that support logical replication (version 10+). If you have an older version you want to bring to PlanetScale, contact us for guidance.
Before beginning a migration, you should check our extensions documentation to ensure that all of the extensions you rely on will work on PlanetScale.
As an alternative to this guide, you can also try our Postgres migration scripts. These allow you to automate some of the manual steps that we describe in this guide.
Want expert guidance for your migration? PlanetScale’s migration services are available to help you plan and execute a smooth, successful move.
1. Prepare your PlanetScale database
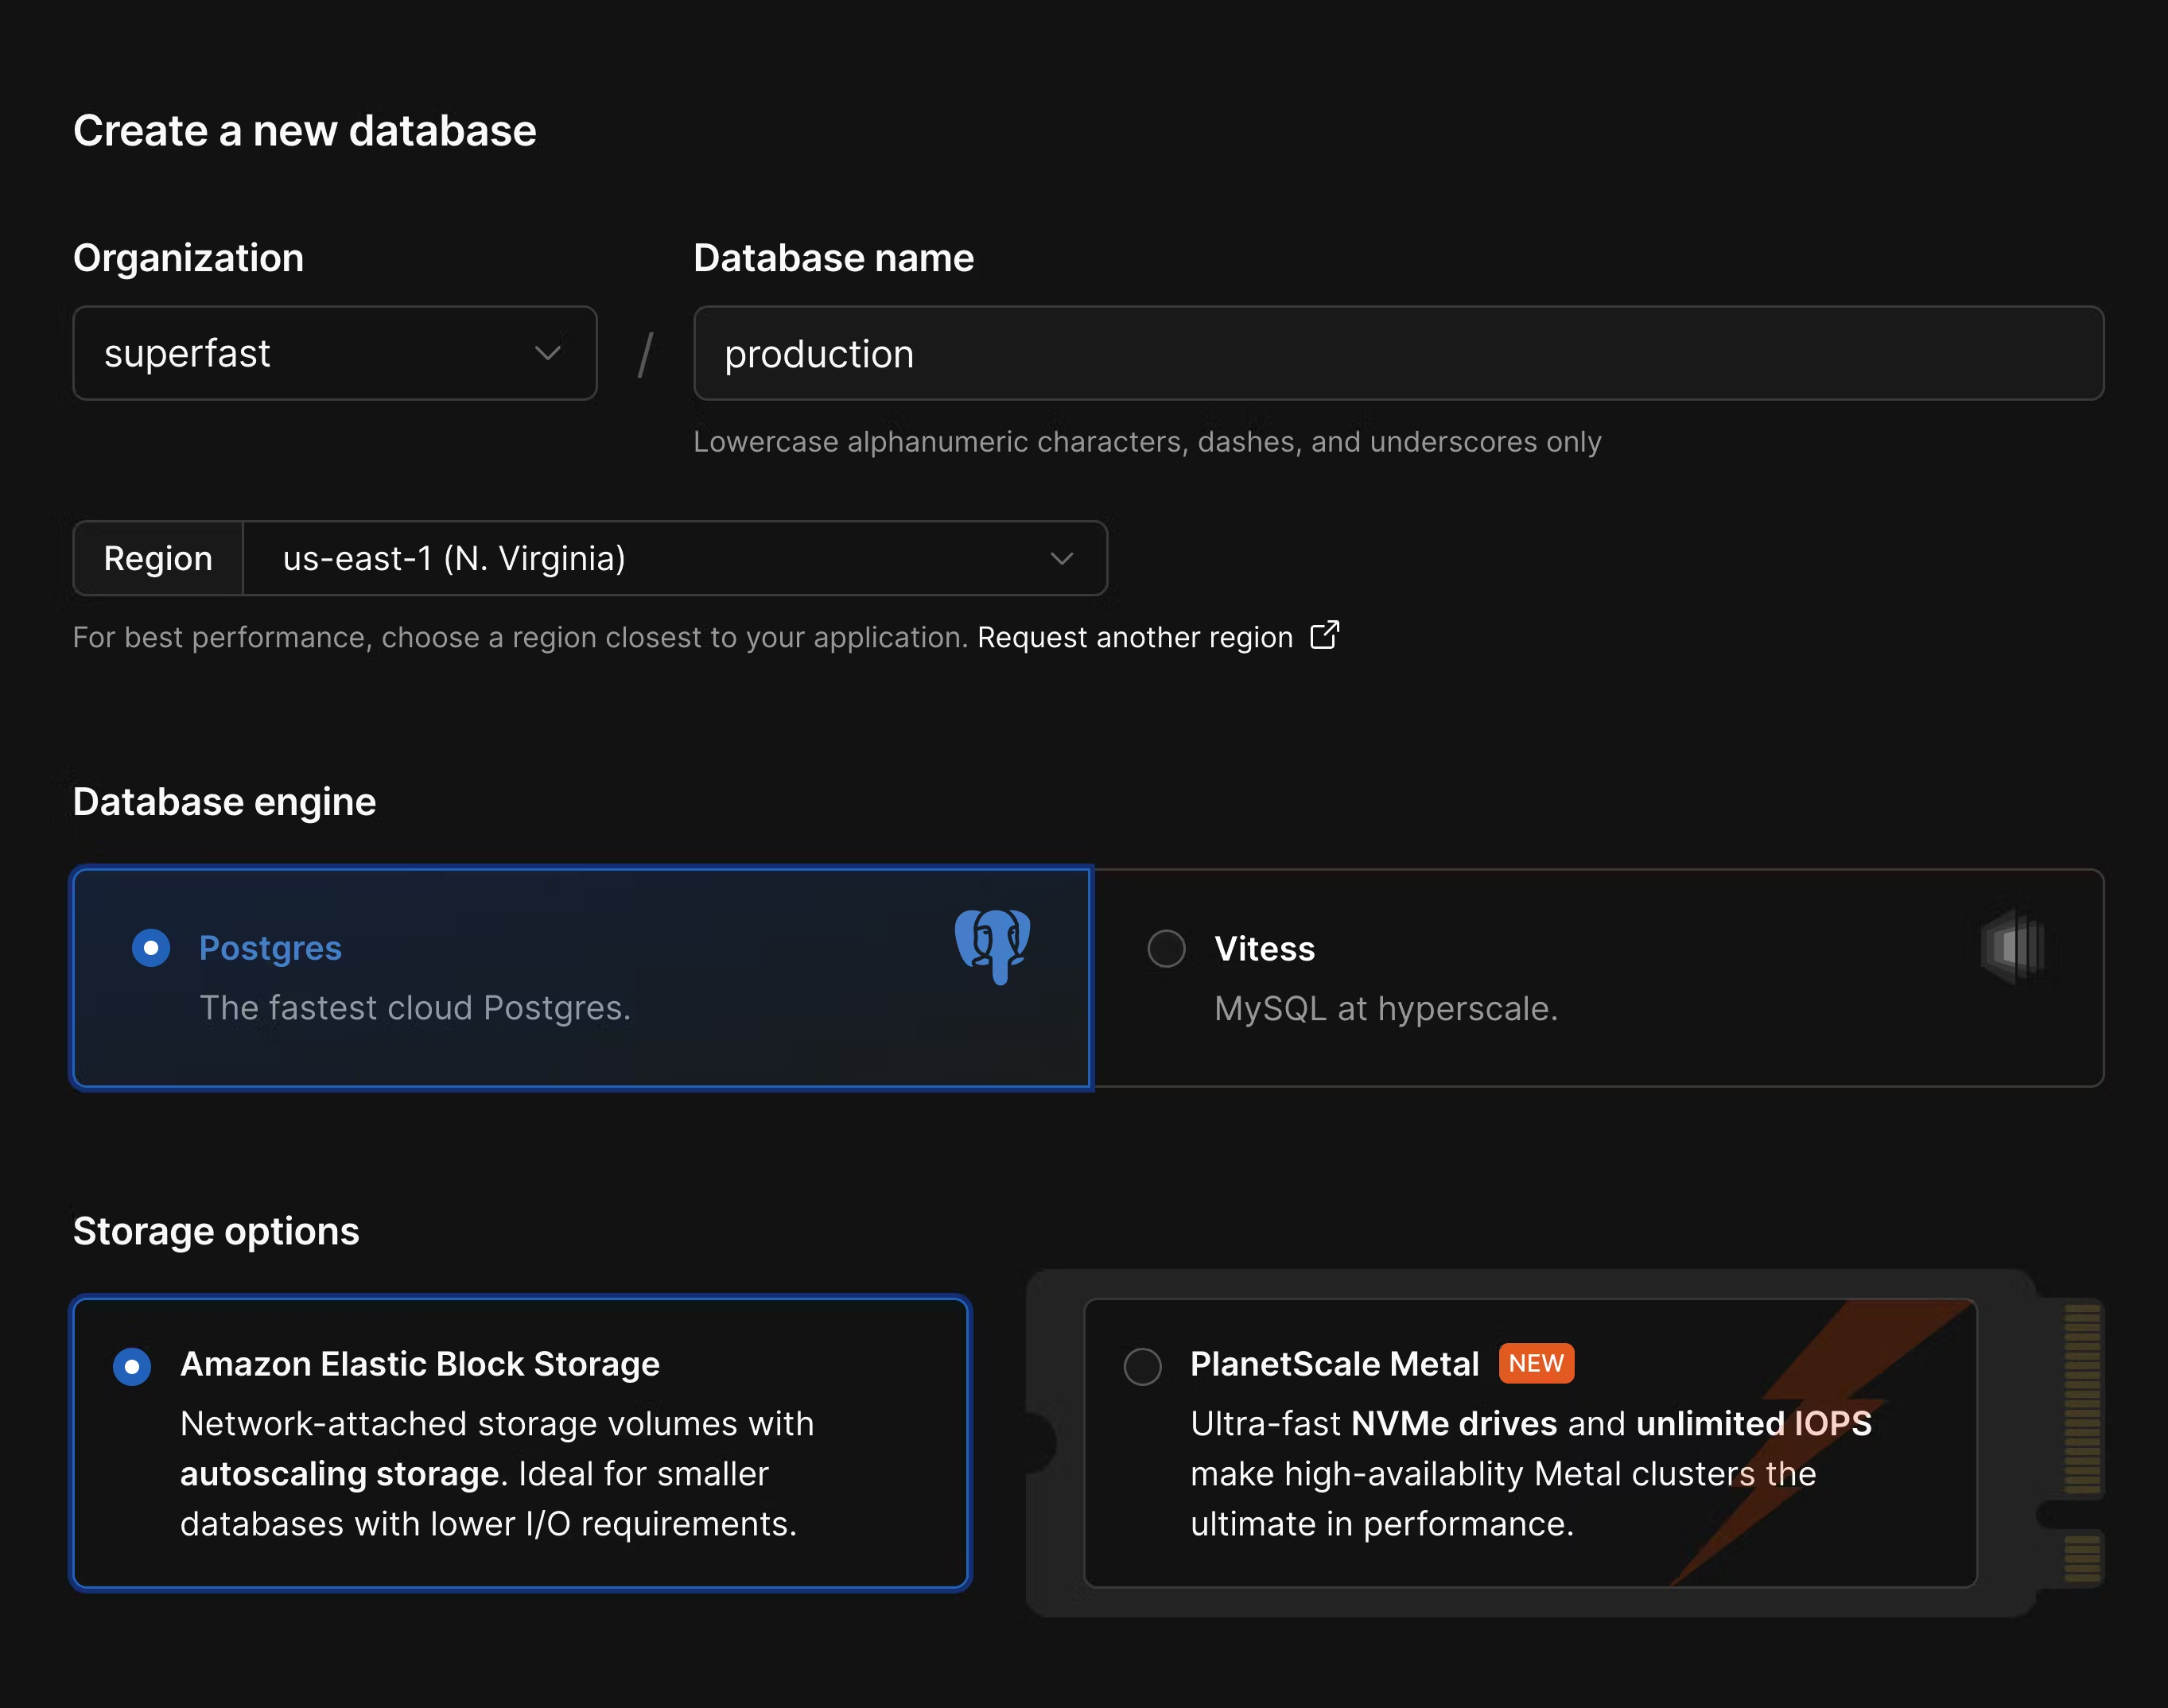
Create a new database in the PlanetScale dashboard or using the PlanetScale CLI. A few things to check when configuring your database:- Ensure you select the correct cloud region. You typically want to use the same region that you deploy your other application infrastructure to.
- Since Supabase uses Postgres, you’ll also want to create a Postgres database in PlanetScale.
- Choose the best storage option for your needs. For applications needing high-performance and low-latency I/O, use PlanetScale Metal. For applications that need more flexible storage options or smaller compute instances, choose “Elastic Block Storage” or “Persistent Disk.”
- Choose between aarch64 and x86-64 architecture. If you don’t know which to choose,
aarch64is a good default choice.
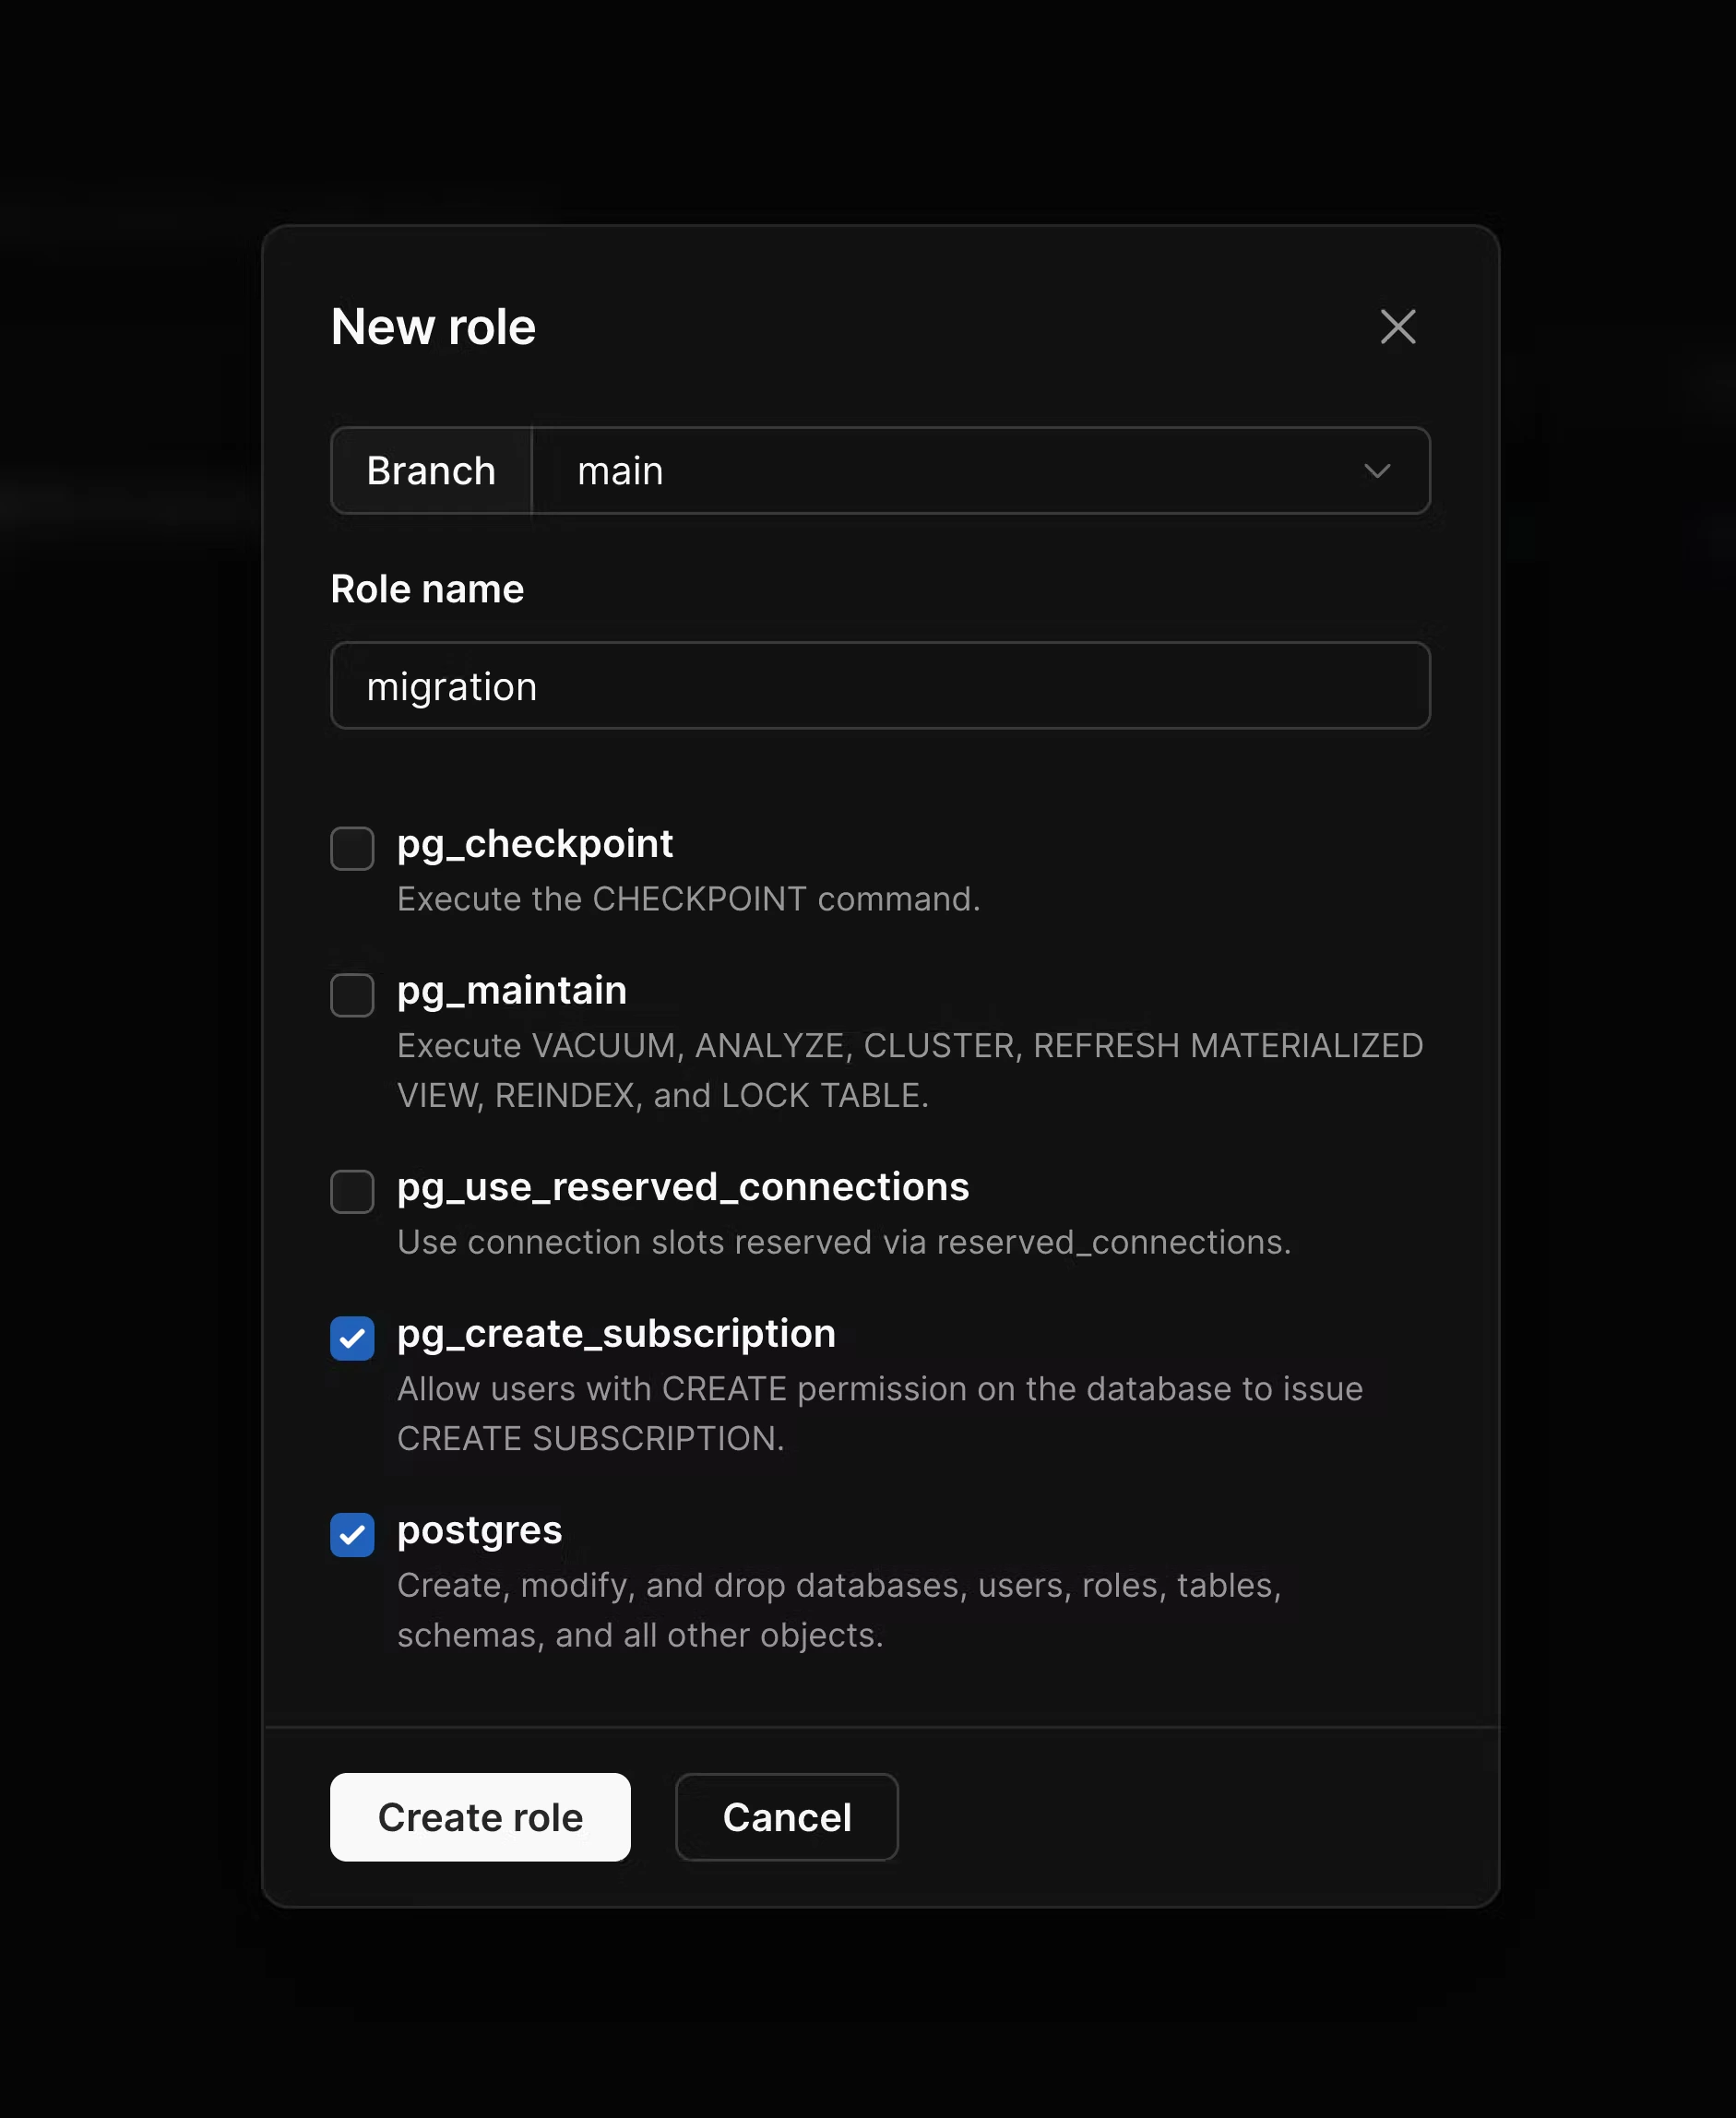
pg_read_all_data and pg_write_all_data are enabled. In addition to these, enable pg_create_subscription and postgres, and then create the role.
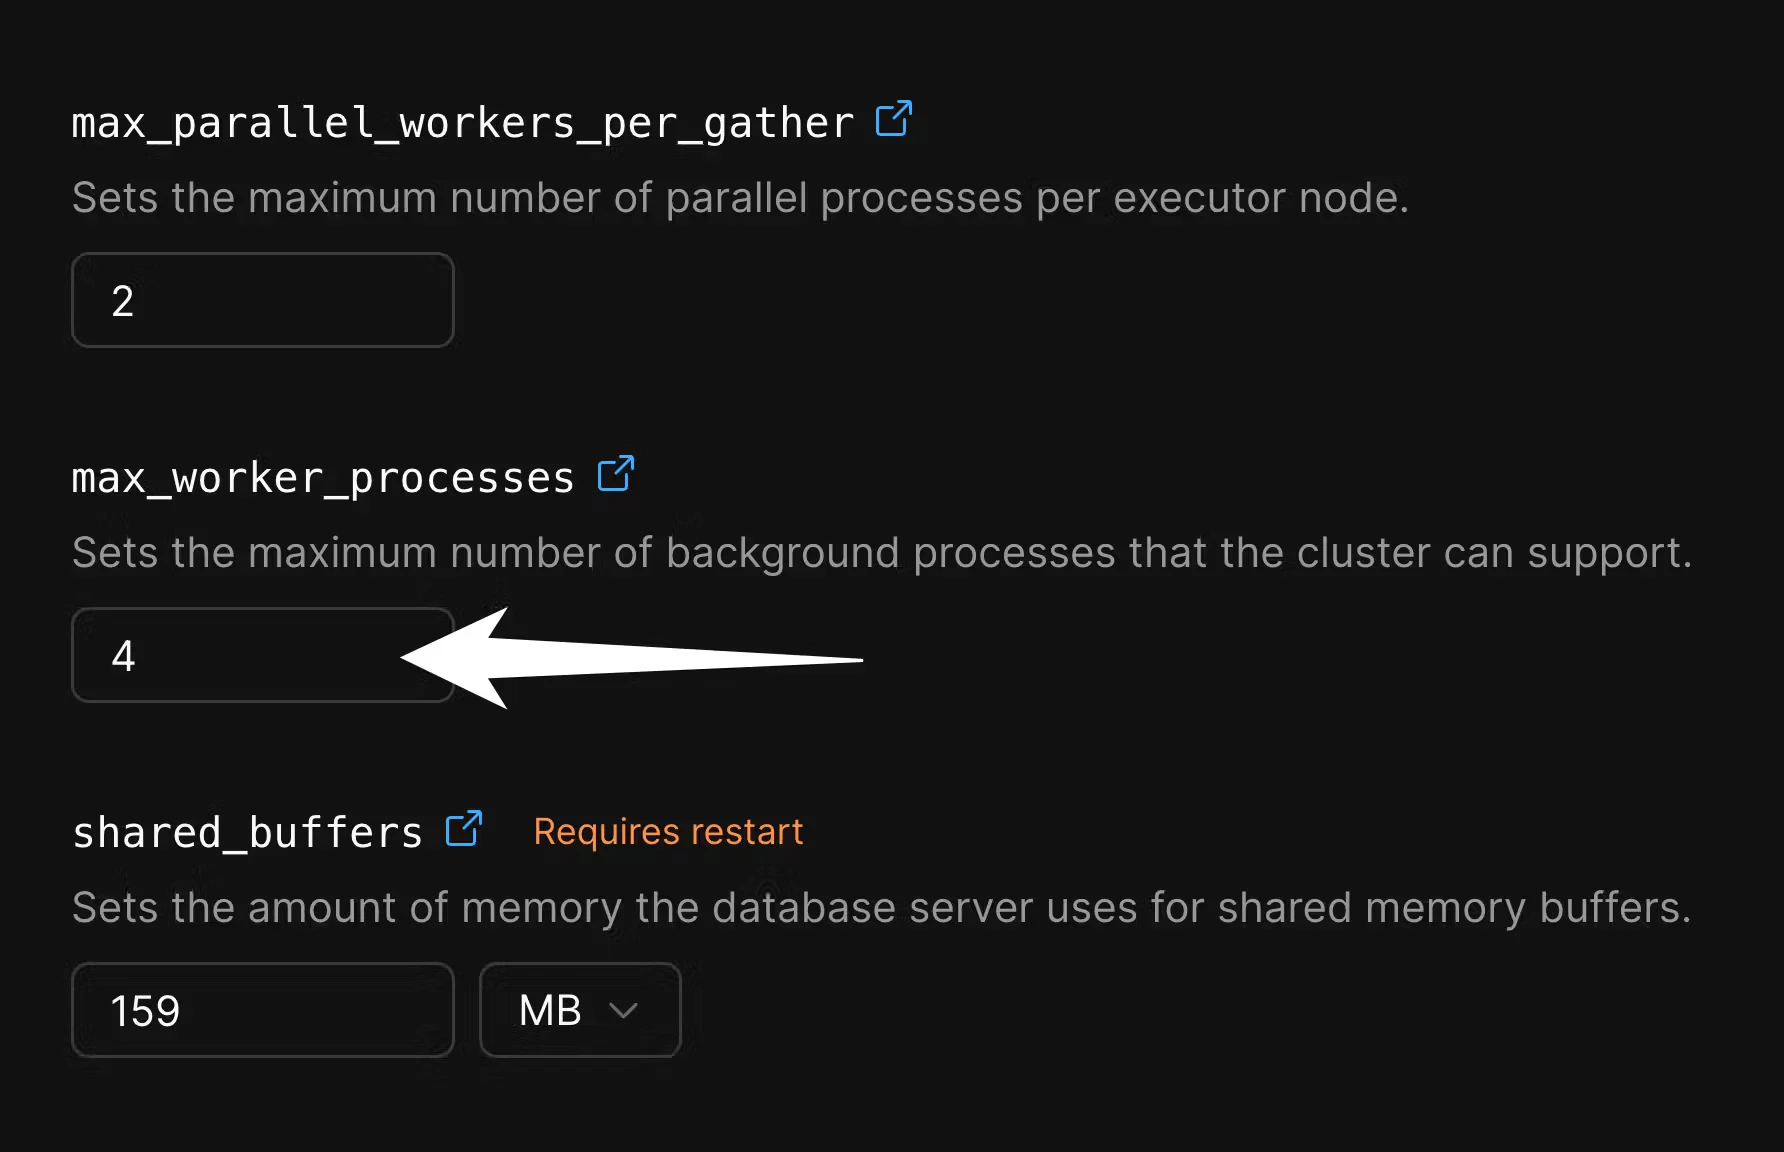
max_worker_processes for the duration of the migration in order to speed up data copying. Go to the “Parameters” tab of the “Clusters” page:
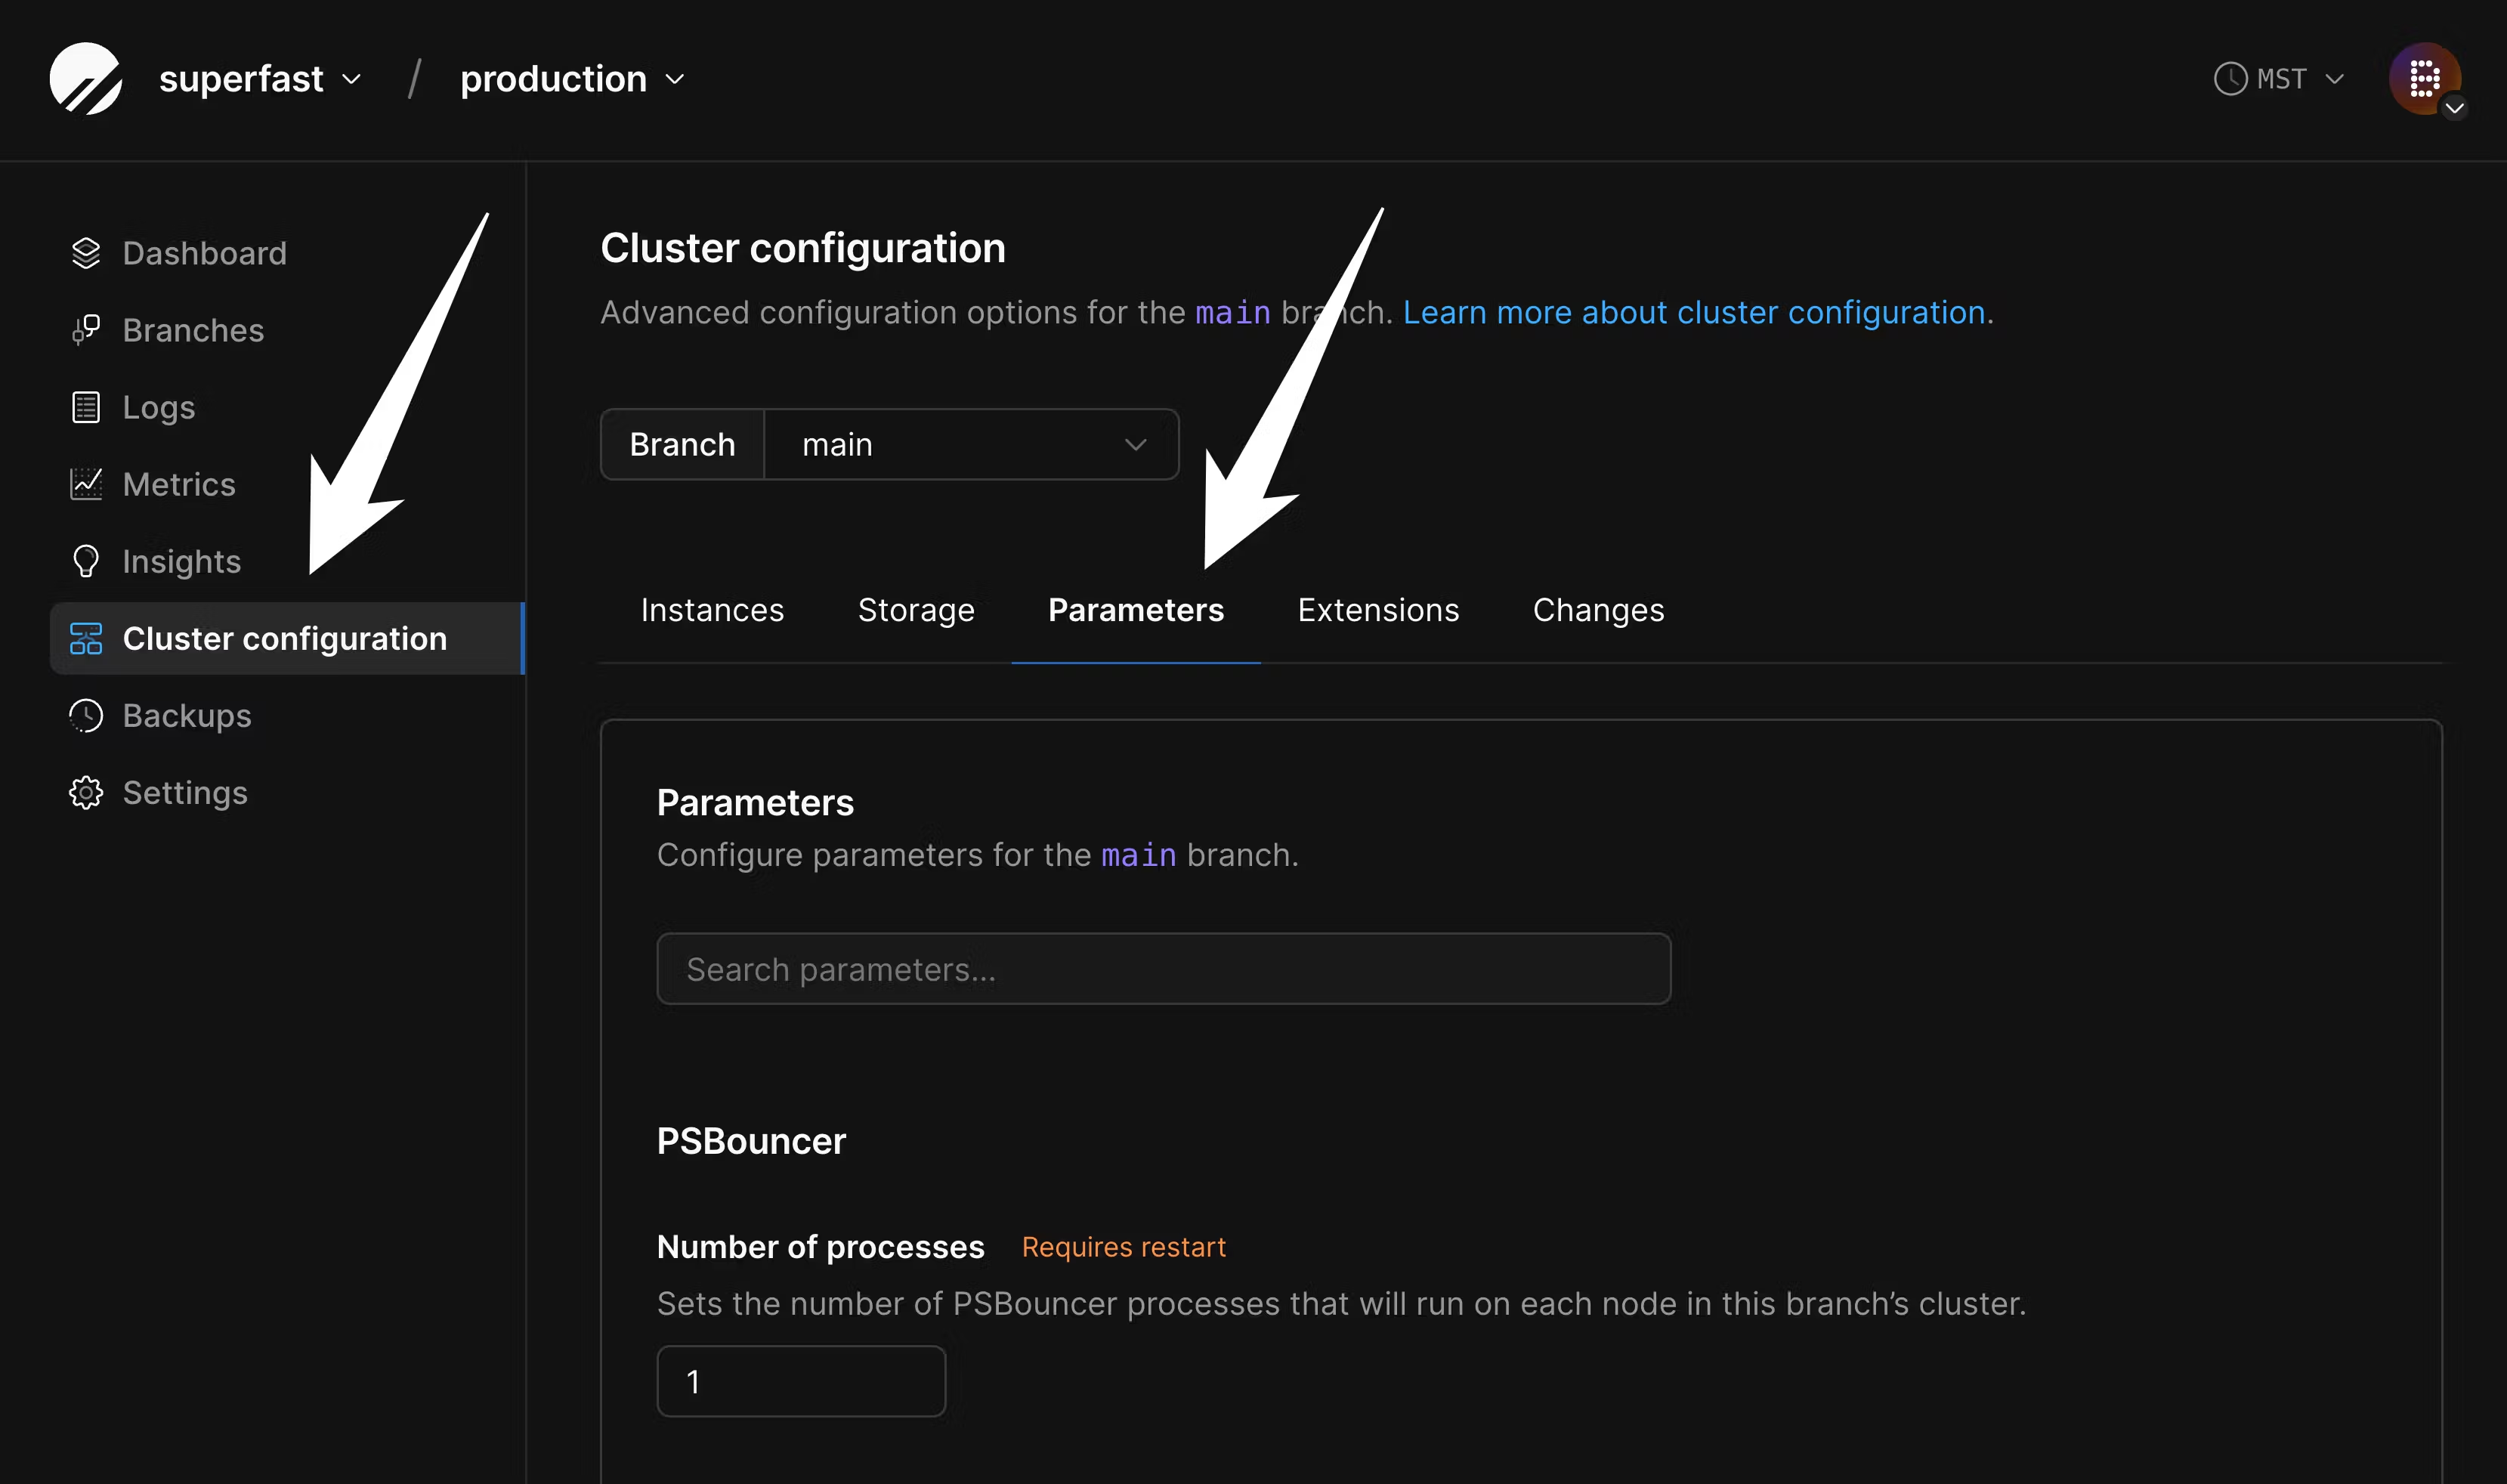
4 to 10 or more:
2. Configure disk size on PlanetScale
If you are importing into a database backed by network-attached storage, you must configure your disk in advance to ensure your database will fit. Though we support disk autoscaling for these, AWS and GCP limit how frequently disks can be resized. If you don’t ensure your disk is large enough for the import in advance, it will not be able to resize fast enough for a large data import. To configure this, navigate to “Clusters” and then the “Storage” tab: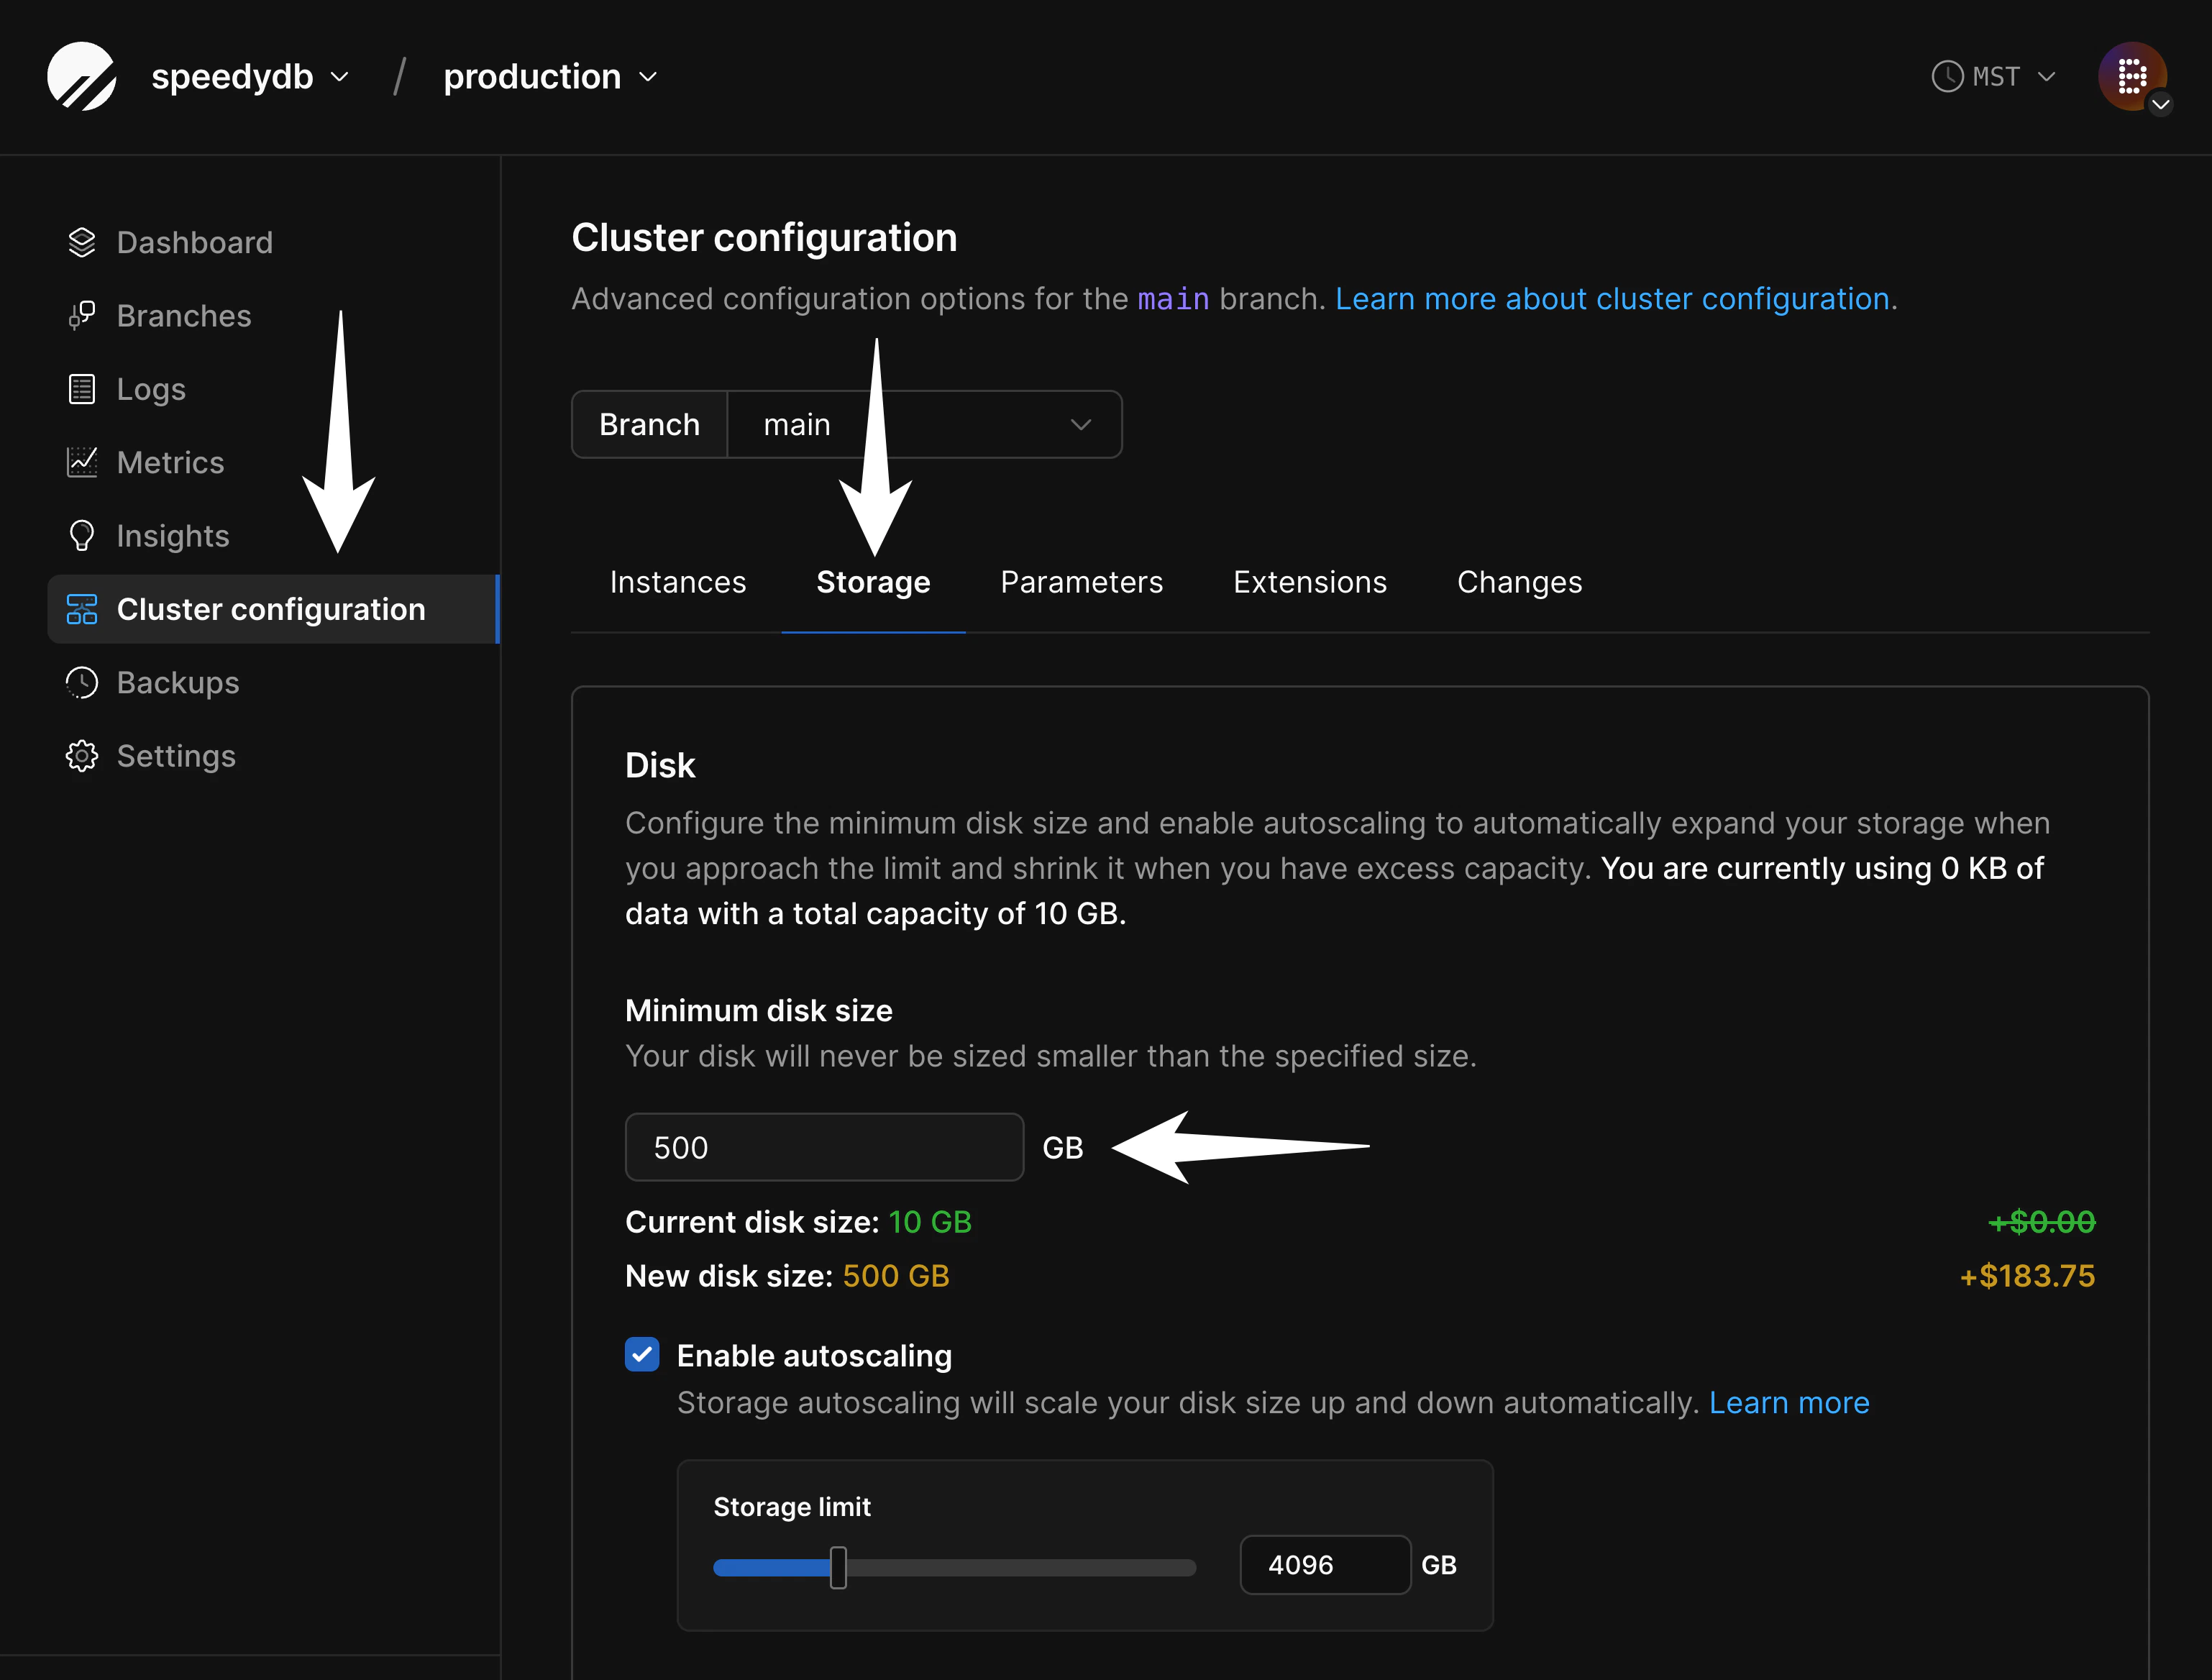
- Data growth during the import process and
- Table and index bloat that can occur during the import process. This can be later mitigated with careful VACUUMing or using an extension like pg_squeeze, but is difficult to avoid during the migration itself.
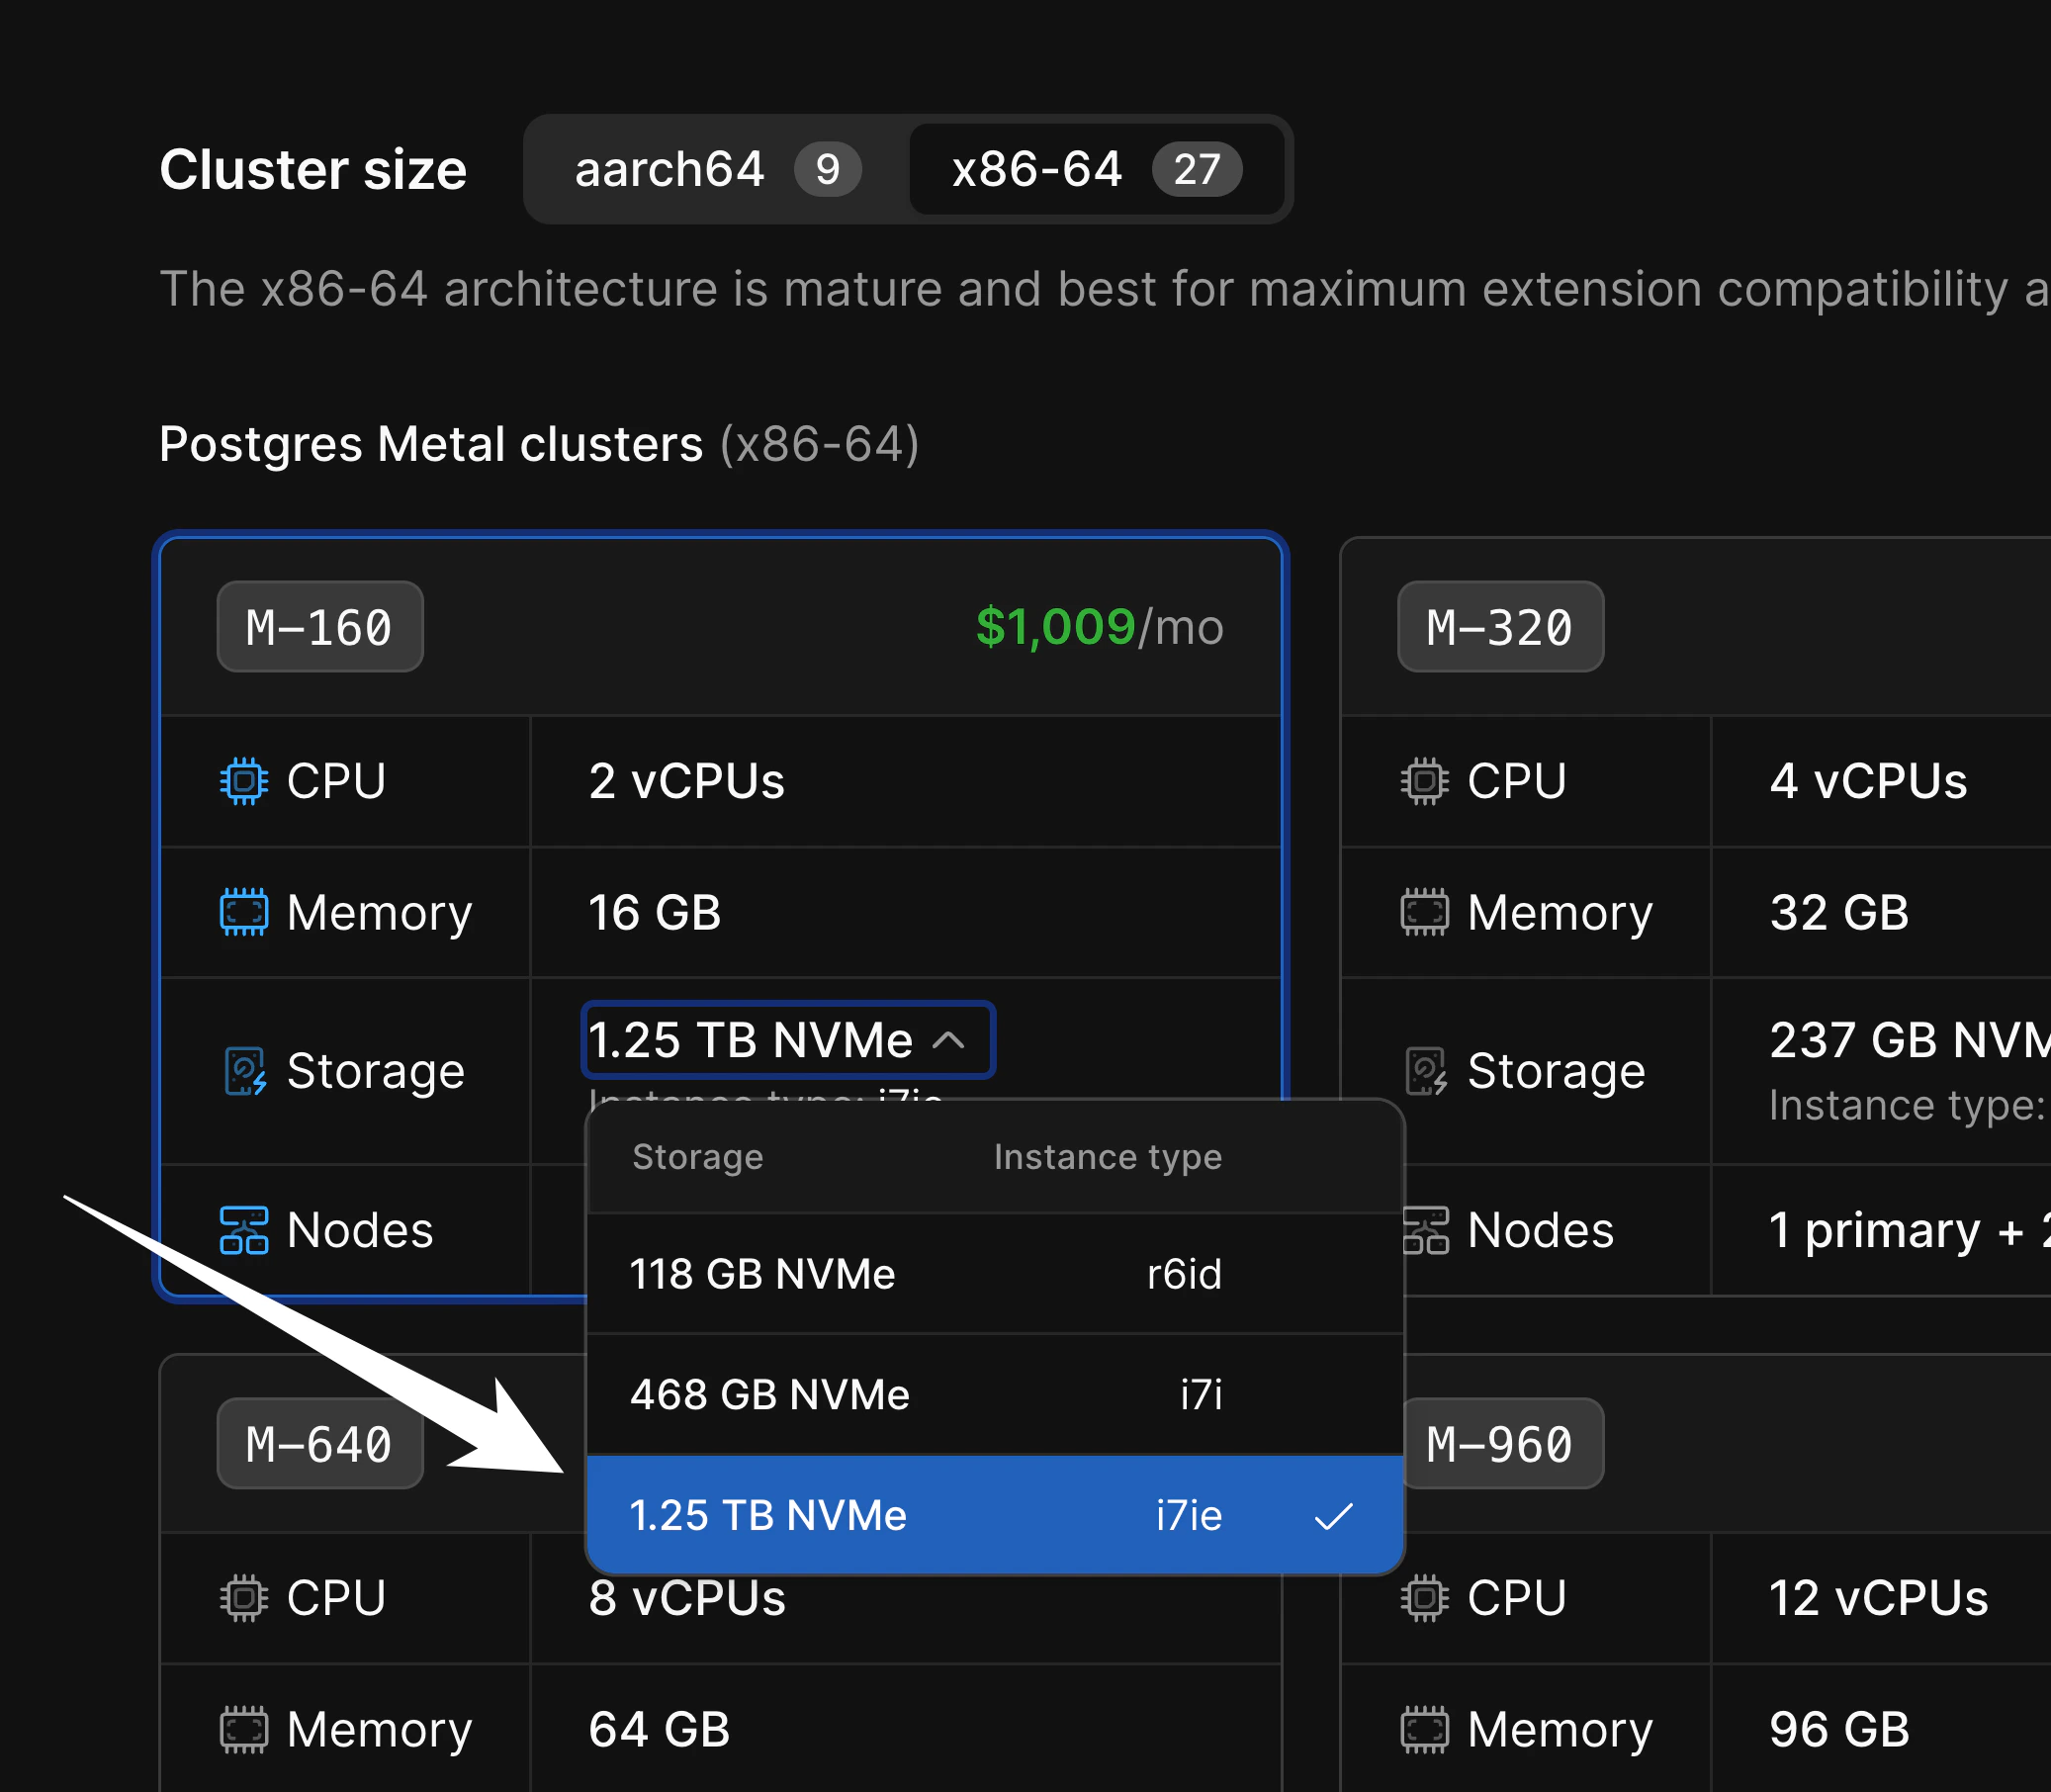
M-160, there are three storage sizes available:
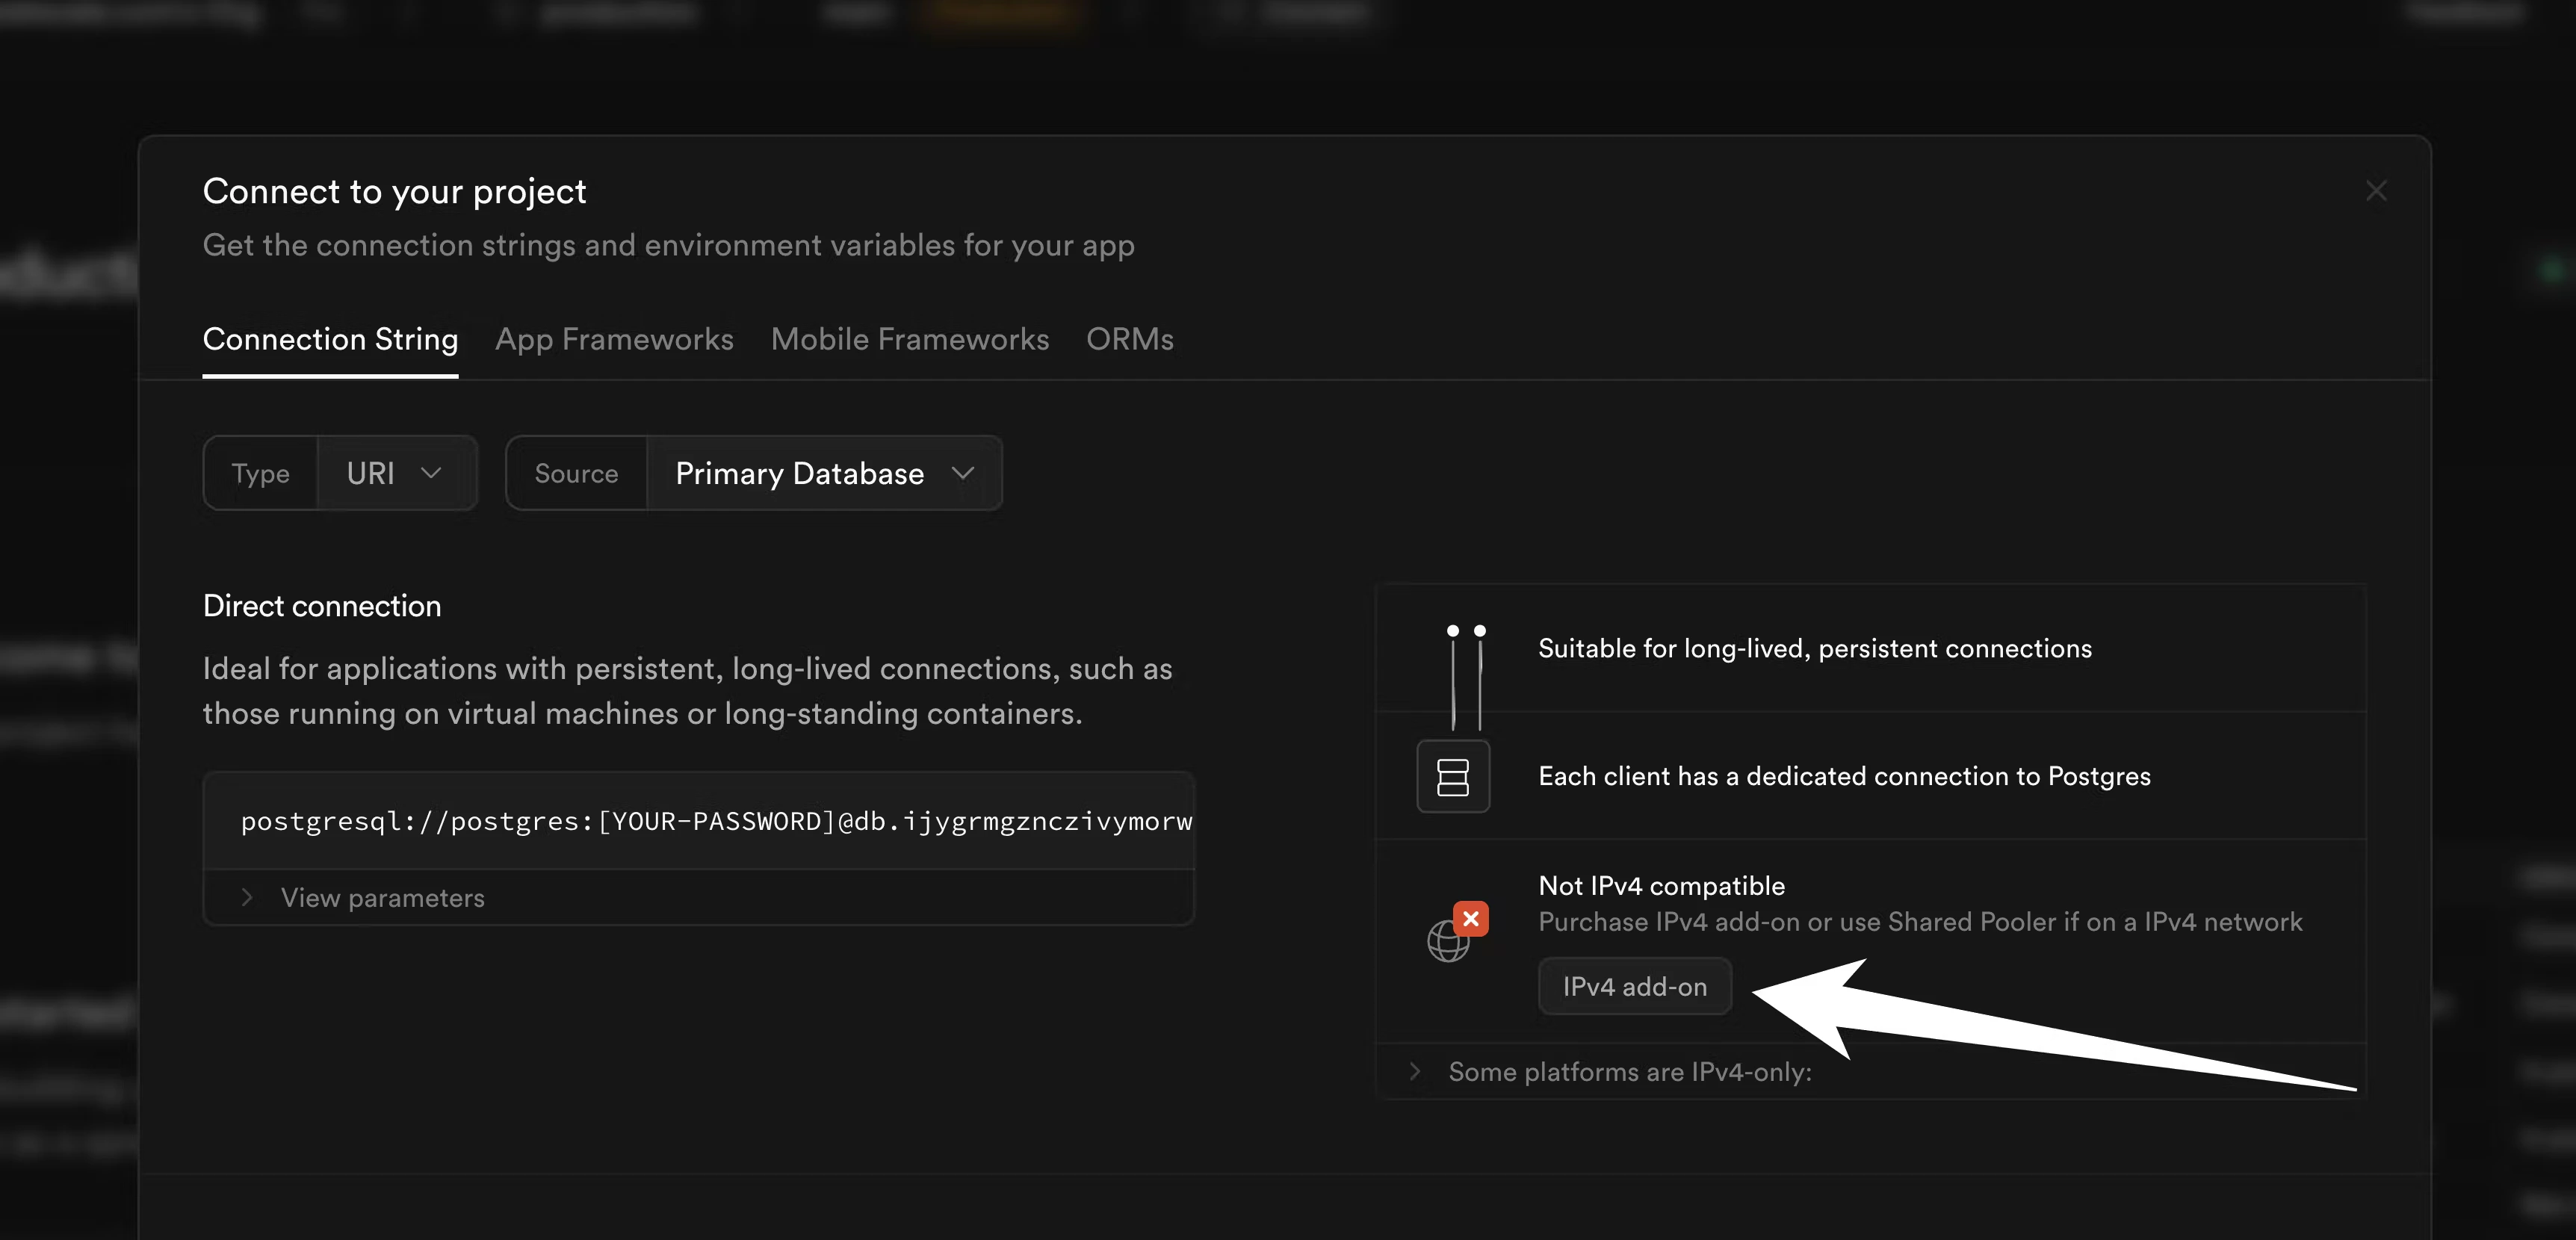
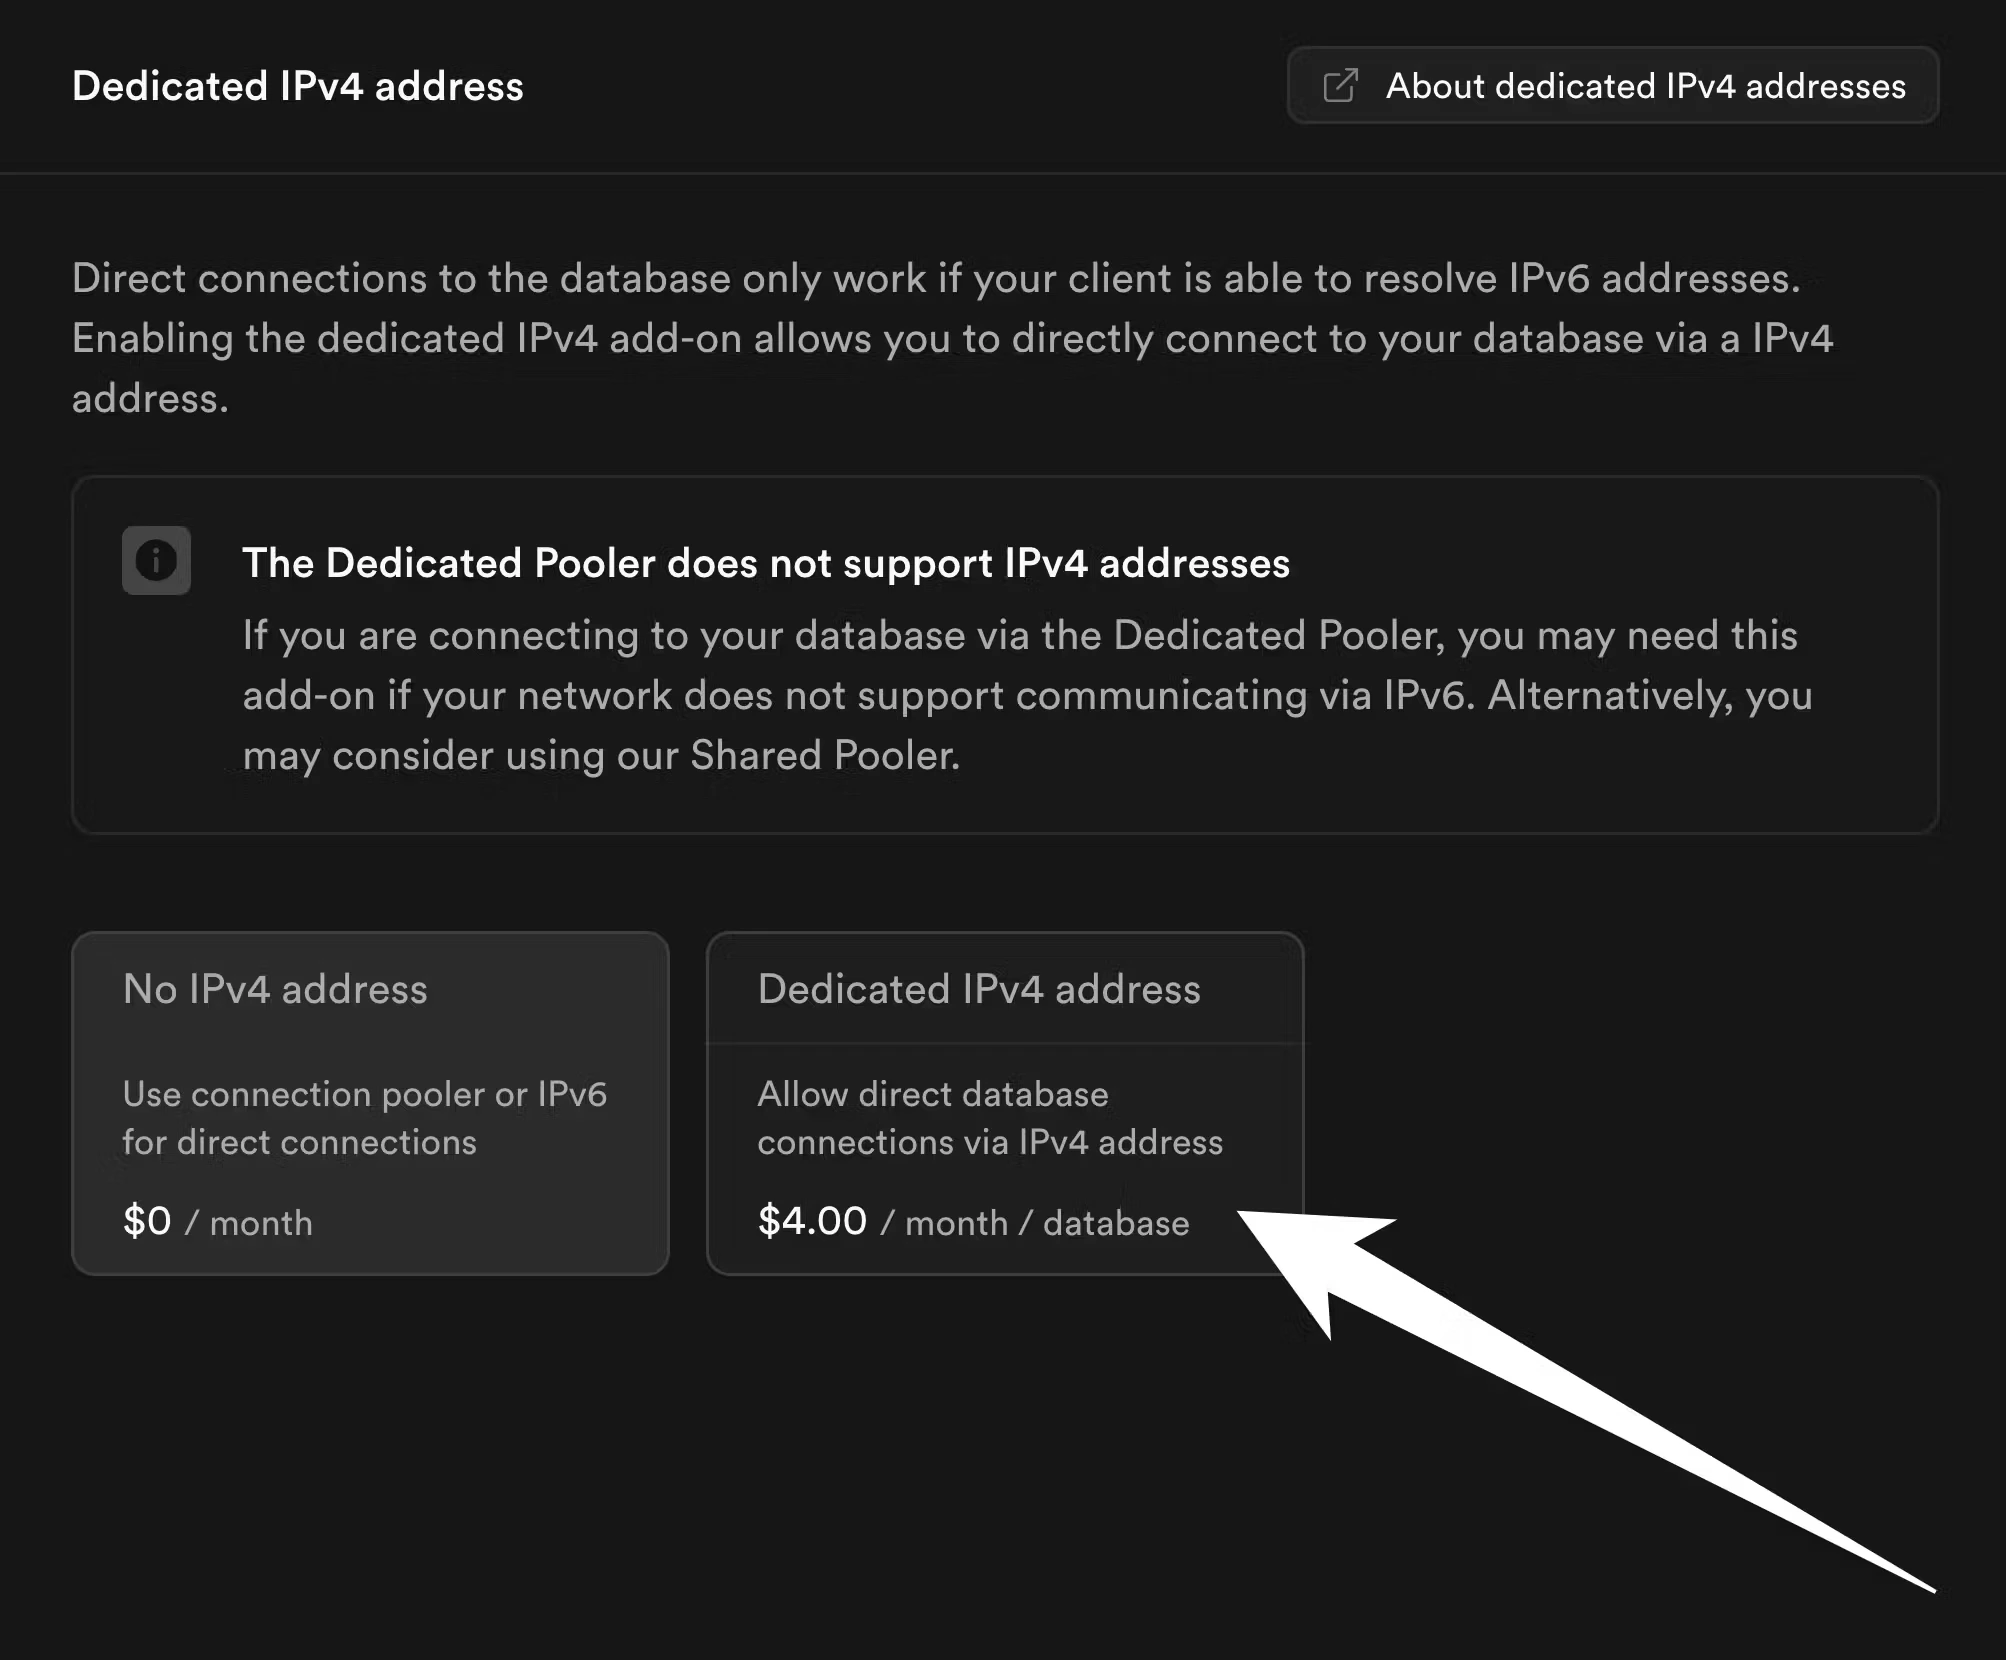
3. Enable IPv4 direct connections in Supabase
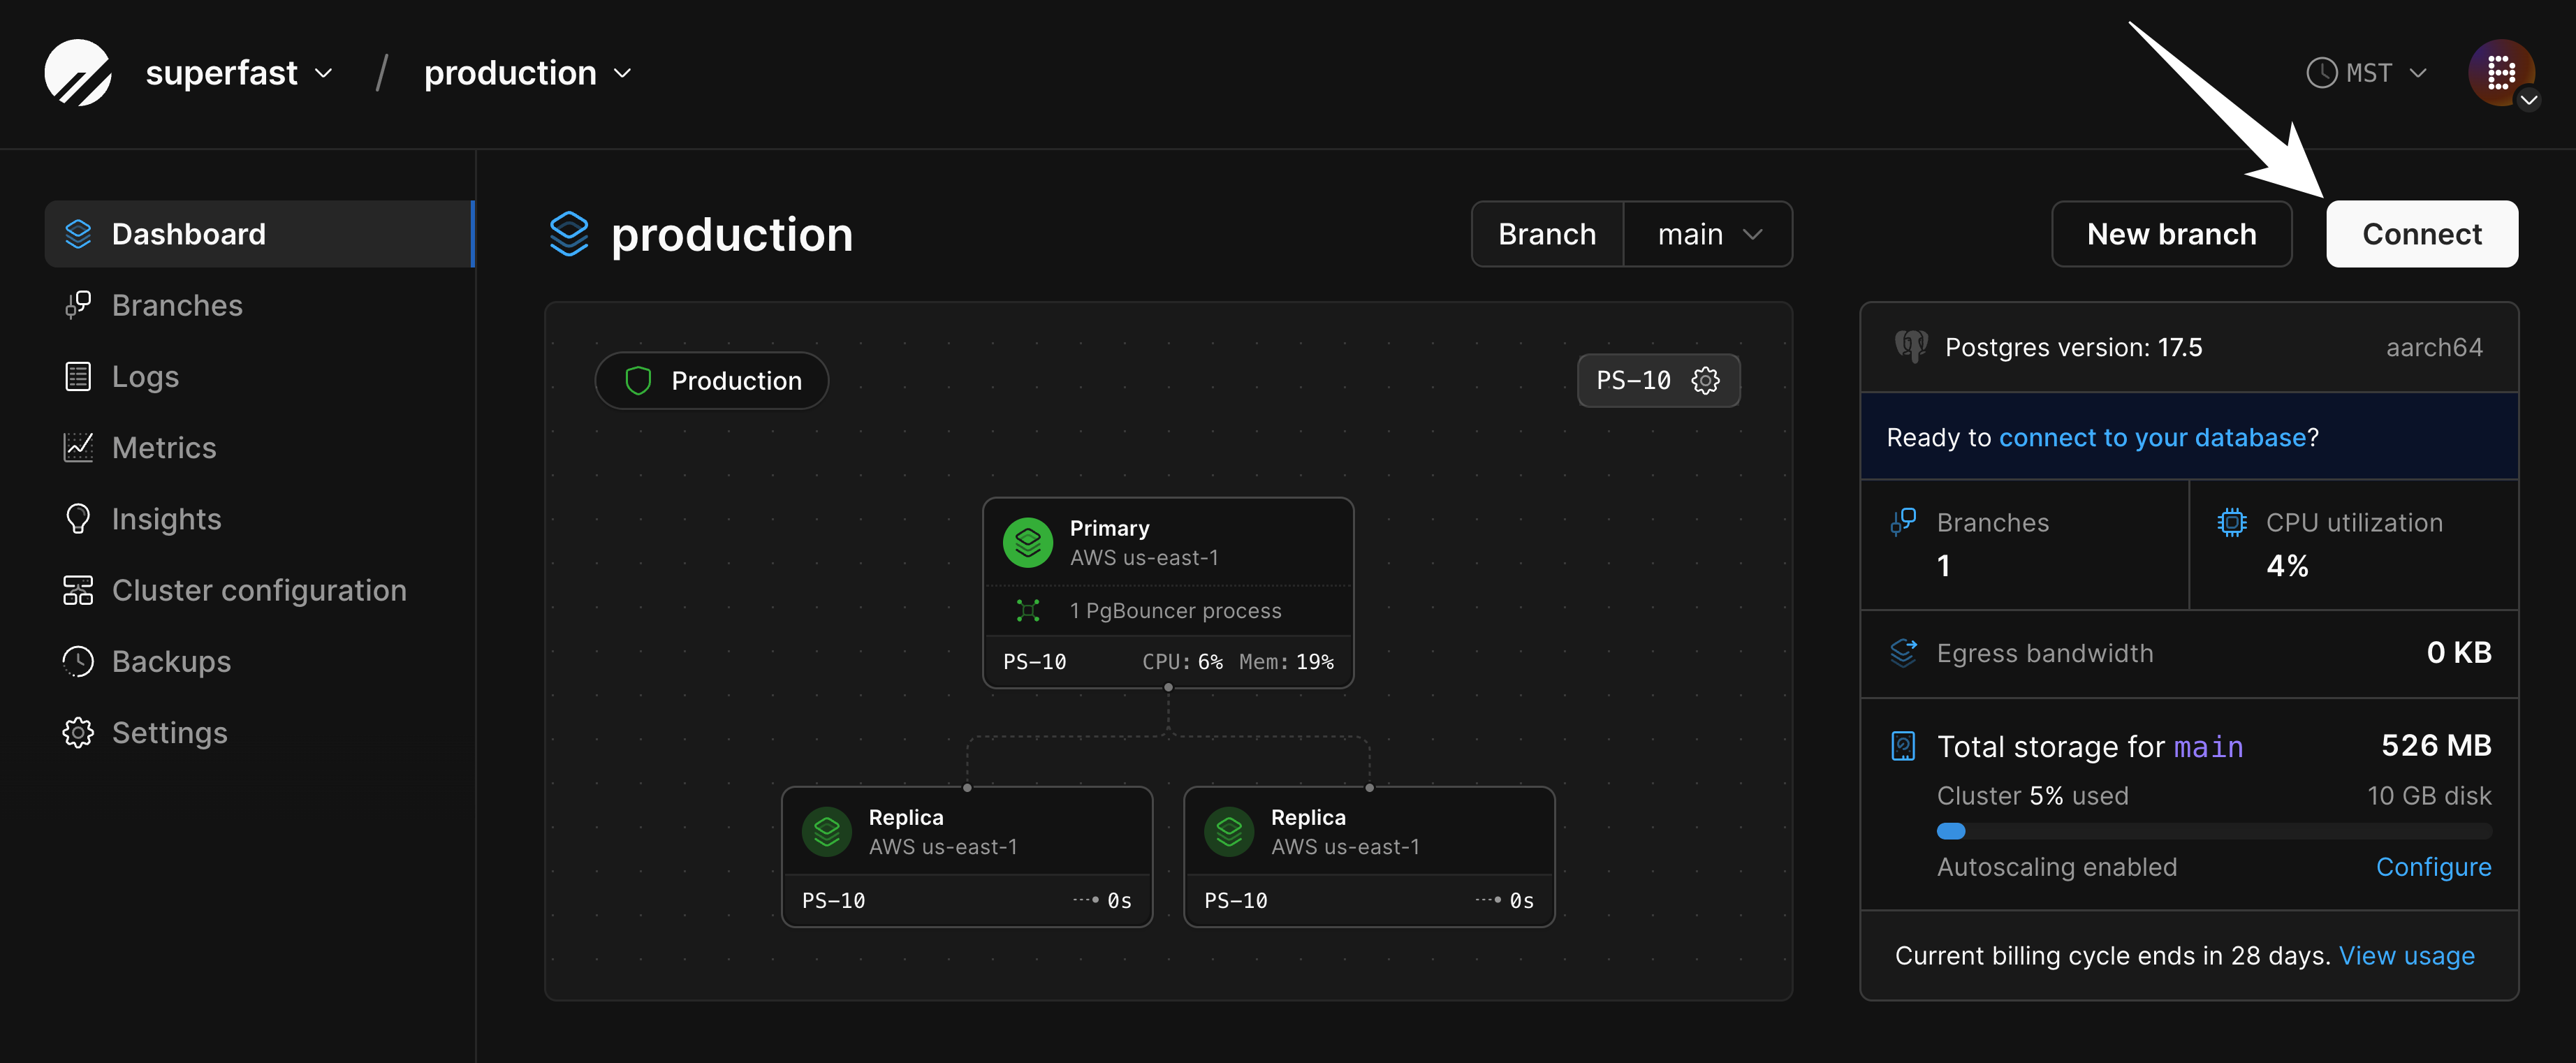
In Supabase, logical replication to external sources requires direct connections. Direct IPv4 connections are not enabled by default. If you have not enabled them yet, go to your project dashboard in Supabase and click the “Connect” button: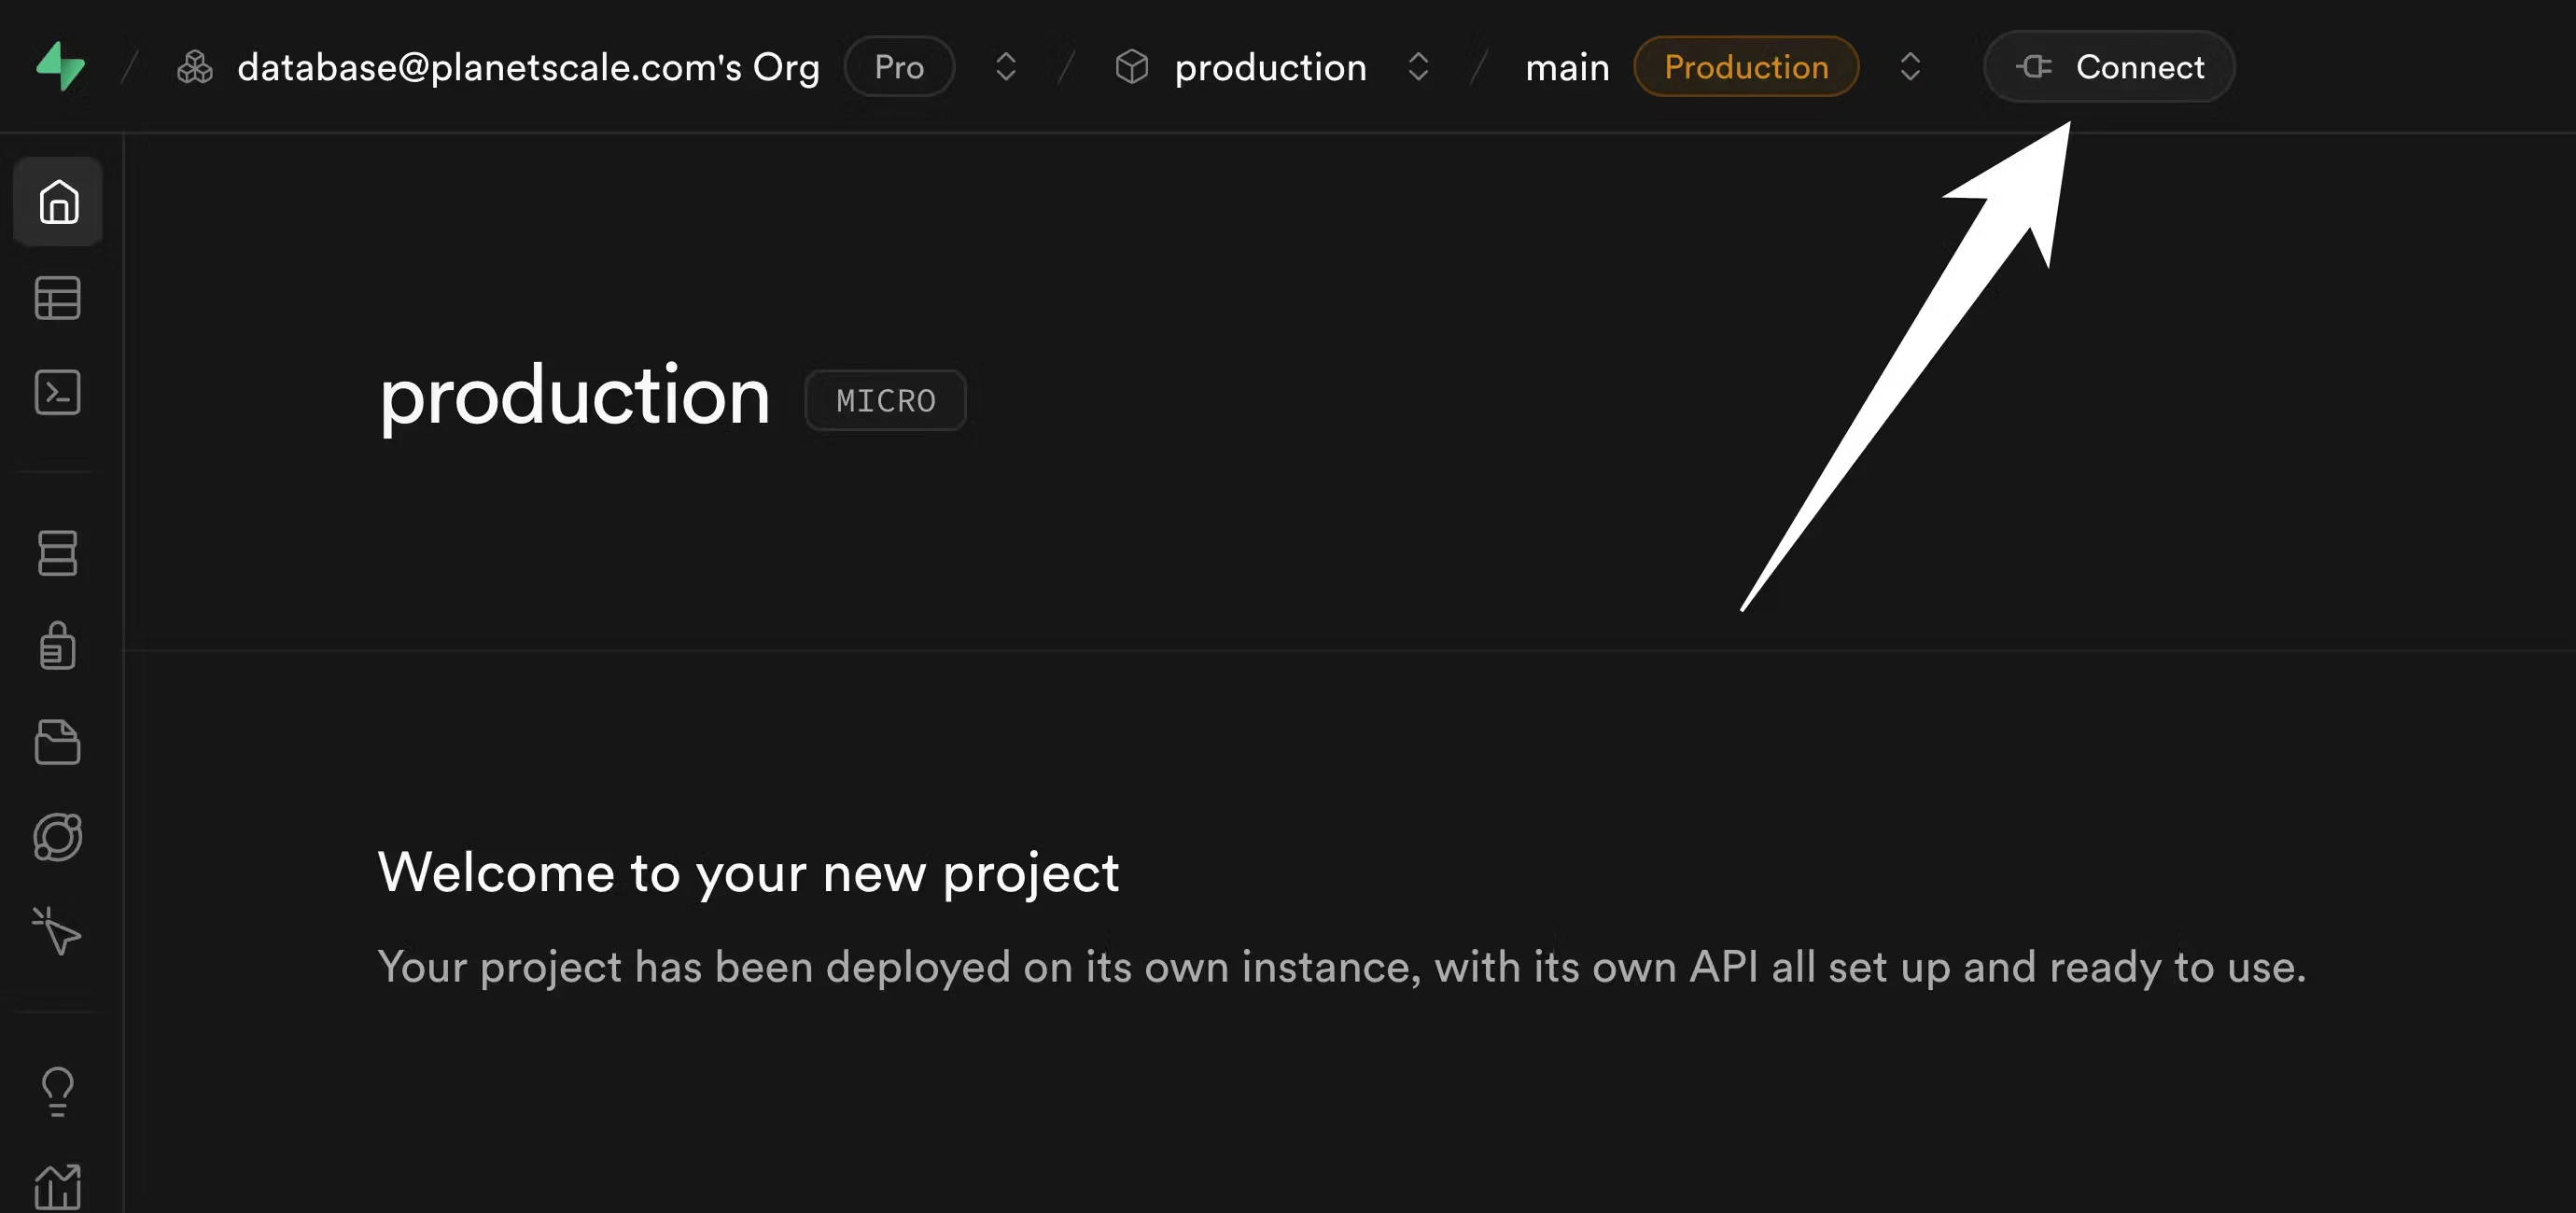
4. Copy schema from Supabase to PlanetScale
Before we begin migrating data, we first must copy the schema from Supabase to PlanetScale. We do this as a distinct set of steps usingpg_dump.
For these instructions, you’ll need to connect to your Supabase role that has permissions to create replication publications and read all data. You also must use a direct IPv4 connection. Your default role that was generated by Supabase when you first created your database should suffice here. We will assume that the credentials for this user and other connection info are stored in the following environment variables.
$SUPABASE_DBNAME that you want to migrate:
schema.sql.
The above command will dump the tables only for the
public schema. If you want to include other schemas in the migration, you can repeat these steps for each, or customize the commands to dump multiple schemas at once.5. Set up logical replication
We now must create aPUBLICATION on Supabase that the PlanetScale database can subscribe to for data copying and replication. This example shows how to create a publication that only publishes changes to tables in the public schema of your Postgres database. You can adjust the commands if you want to do so for a different schema, or have multiple schemas to migrate.
First, run this command on your Supabase database to get all of the tables in the public schema:
SUBSCRIBE to this publication.
Monitoring your migration
Once the subscription is created, PlanetScale begins copying data from Supabase. This section explains what is happening internally and how to track progress.What happens during the copy
When the subscription is created withcopy_data = true, PostgreSQL proceeds in two phases:
Initial table sync (copy phase)
PostgreSQL spawns tablesync workers on the PlanetScale side. Each worker opens a replication connection to Supabase and copies one table at a time using a consistent snapshot taken at subscription creation. Up to max_sync_workers_per_subscription tables are copied in parallel (the default is 2; we recommend increasing max_worker_processes as described above to allow more parallelism).
Because your schema was loaded before the subscription was created, all indexes are live during this phase. Expect elevated CPU on PlanetScale for the duration — this is normal. The larger and more heavily indexed your tables, the longer this phase takes.
Steady-state replication (streaming phase)
Once all tables are copied, the tablesync workers exit and a single apply worker takes over, streaming WAL changes from Supabase in real time. CPU usage will drop significantly at this point. This is the state you want to reach and maintain until cutover.
Tracking table sync progress
Run this on your PlanetScale database to see the sync state of each table:ready, the initial copy is complete and you are in steady-state replication.
Checking replication lag
You can compare Log Sequence Numbers (LSNs) between Supabase and PlanetScale to measure how far behind the subscriber is. This is useful both for monitoring progress during the copy phase and for confirming that replication is fully caught up before cutting over. Run this on PlanetScale to see the last LSN received by the subscription:received_lsn from PlanetScale against pg_current_wal_lsn() from Supabase. During the initial copy phase, these values will diverge — this is expected. Once all tables are in the ready state, they should converge quickly. When both values match, the subscriber is fully caught up with the source.
Troubleshooting
CPU is elevated on PlanetScale This is expected during the copy phase. Each tablesync worker is writing rows and maintaining indexes simultaneously. CPU will return to normal once all tables reach theready state.
Rows are not appearing on PlanetScale
Check that tablesync workers are active:
max_worker_processes is high enough to accommodate the subscription workers plus any other background processes (autovacuum, etc.).
A table is stuck in the copying or catching up state
Check for locks on the PlanetScale side that may be blocking the tablesync worker:
received_lsn is falling further behind pg_current_wal_lsn() during steady-state replication, your source may be generating changes faster than the single apply worker can apply them. This is uncommon for typical workloads but can occur with very high write volume. Contact PlanetScale support if you observe this.
6. Handling sequences
Logical replication is great at migrating all of your data over to PlanetScale. However, logical replication does not synchronize thenextval values for sequences in your database. Sequences are often used for things like auto incrementing IDs, so it’s important to ensure we update this before you switch your traffic to PlanetScale.
You can see all of the sequences and their corresponding nextvals on your source Supabase database using this command:
nextval for the users_id_seq is 105, the nextval for the posts_id_seq is 1417, and the nextval for the followers_id_seq is 3014. If you run the same query on your new PlanetScale database, you’ll see something like:
nextvals produced will be greater than any of the values previously produced on the source Supabase database, avoiding constraint violations. There are several approaches you can take for this. A simple way to solve the problem is to first run this query on your source Supabase database:
nextval by 10,000 for each sequence:
nextvals before you switch your primary to PlanetScale. For tables that have a high insertion rate, you might need to increase this by a larger value (say, 100,000 or 1,000,000).
7. Cutting over to PlanetScale
Before cutting over, confirm that replication is fully caught up by checking replication lag. Thereceived_lsn on PlanetScale should match pg_current_wal_lsn() on Supabase. If they do not match, the PlanetScale database has not yet applied all changes from Supabase — wait for the values to converge before proceeding.
Once replication is caught up, update your application’s database connection credentials to point to PlanetScale and deploy.
After doing this, new rows written to PlanetScale will not be reverse-replicated to Supabase. Thus, it’s important to ensure you are fully ready for the cutover at this point.
Once this is complete, PlanetScale is now your primary database!
We recommend you keep the old Supabase database around for a few days, in case you discover any data or schemas you forgot to copy over to PlanetScale. If necessary, you can switch traffic back to the old database. However, keep in mind that any database writes that happened with PlanetScale as the primary will not appear on Supabase. This is why it’s good to test the database thoroughly before performing the cutover.
8. Post-cutover cleanup (optional)
After confirming your application is fully running on PlanetScale, you can clean up logical replication resources:- On PlanetScale, drop the subscription:
- On Supabase, drop the publication: